
Everyone's Using These DIY Kits to Try the Popular Brow Lamination Trend at Home
Long gone are the days of the thin, low arched eyebrows, a la the early ’90s. Beauty lovers everywhere remain in deep reverence of bushy brows. After all, brows proudly roamed wild and free during the pandemic when salons were closed, and it seems “the fluffier, the better” look may be here to stay forever, as full eyebrows frame the face and can even make you look more youthful.
If standout brows are your signature, you’re in luck. With some expert guidance, you can achieve a bold brow style from the comfort of your own home thanks to the new eyebrow lamination trend, a technique that creates a brushed-up, feathery look. We talked to eyebrow experts in order to walk you through the ins and outs of eyebrow lamination, including how to DIY the trend at home using the best eyebrow lamination kits.
What exactly is eyebrow lamination?
For those new to the process, eyebrow lamination is basically a perm for your eyebrows (without the curly element). A chemical solution is combed through brow hairs to break down the outer cuticle layer so when they're set, they stay put in a fluffy, brushed-up direction. By laminating your eyebrows, you’re changing the orientation of the hairs at the root, “so they remain up or in place when you brush them,” says Elke Von Freudenberg, eyebrow expert and owner of Elke Von Freudenberg Salon in New York City. "You’re able to redirect the hairs to create a thicker, fuller-looking brow."
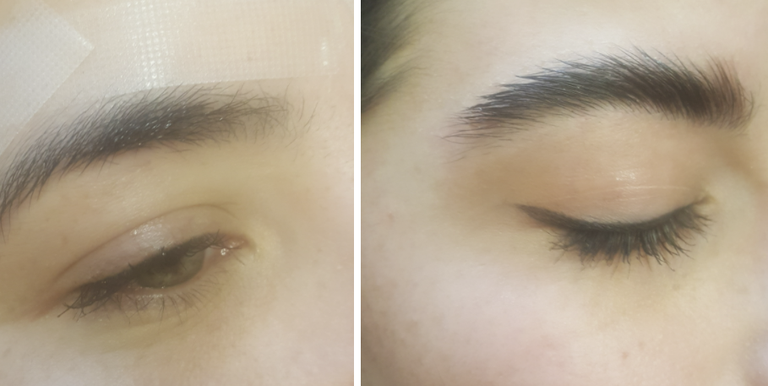
There are many different ways you can brush your brows, depending on your desired final look. “Some people want a really high fashion, almost spiky look, and some people want a much more subtle end result that just makes their brows look a little bit more filled in,” explains Rebecca Hoffman, owner of Bespoke Brows NYC.
Whichever style you decide on, know that the entire process takes from 20 to 40 minutes and the lamination itself lasts anywhere from four to eight weeks, depending on the type of serum and kit used. The process can be done both in a salon that offers eyebrow services or at home using a DIY eyebrow lamination kit.
A word of caution: Von Freudenberg and Hoffman suggest you proceed carefully when using a DIY eyebrow lamination kit at home. Should the process go awry, it is difficult to fix brows in the salon, as reprocessing them can contribute to further damage.
If you're worried that DIY brow lamination will ruin your eyebrows, it's true that you do want to be very careful when doing the process at home. “Brow hairs are different than head hairs, in that they are a lot more delicate,” Hoffman says. “Your eyelids are the thinnest skin on your entire body, so if your treatment goes wrong, your eyebrows can't be reprocessed to fix them immediately thereafter.” To avoid an emergency phone call to a salon, Von Freudenberg recommends precisely following the directions on your kit and not leaving the solution on for too long, especially if your eyebrows are thinner.
Is brow lamination right for you?
In recent years, services like eyebrow tweezing, tinting, threading, waxing and microblading have been booming, providing a variety of options for to keeping your eyebrows in shape (literally). Microblading is a semi-permanent tattoo technique that “is used to create hair-like strokes into the skin to mimic brow hair, or to shade in the skin to hide or soften a patch where there is no hair growth,” Von Freudenberg says. “Brow lamination is a great way to create a microbladed look without the expense and potential risk of the microblading gone wrong.”
If you’re thinking of doing eyebrow lamination in conjunction with other services, Hoffman suggests doing a DIY lamination first because the treatment shapes your brows — and you want to make sure any other treatments done by a brow professional is based on that shape.
The Best DIY Eyebrow Lamination Kits
There are many different eyebrow lamination kits available on the market; be sure to follow the advice above and the packaging directions closely for optimal results. Here are some top-rated kits to try:
How to DIY an Eyebrow Lamination
Now that you know the important details of eyebrow lamination, let’s get to the actual process. Each eyebrow lamination kit’s instructions vary, but these are the general steps to consider:
Test a bit of the solution on a small patch of brow hair at least a day before doing the actual lamination. “Make sure to keep the area in which you tested the solution dry for 24 hours,” Hoffman advises. “This will allow you to see if your skin has any sensitivities or allergies, either immediate or delayed, to any of the lamination ingredients.”
If you have no reactions, the following day try brushing your eyebrows using a spoolie brush in order to see how your end result may look. “What's beautiful about eyebrows is they’re all so unique and different,” says Hoffman says. “So there’s not really a one size fits all way of brushing or styling your brows.” Settle on a shape you like before proceeding.
Next, use an ointment to create a barrier around your eyebrows that will shield your skin. “The solution can irritate skin,” says Von Freudenberg says. “A light layer of an ointment like Vaseline is perfect to protect the skin around the brow.”
If your kit includes an eyebrow cleanser, apply it according to packaging directions.
Next, apply the included brow lift solution carefully per the instructions. Be warned that “if your lamination product has no instructions, I highly recommend not using it, as it could be a perm solution that's used regular hair, which is too strong for eyebrows and skin,” Von Freudenberg says.
After covering your brows in the solution, brush through the hairs until you achieve the desired style and then let it sit. Depending on the brand, the solution can be left on anywhere from five to 15 minutes. “Some brands recommend placing plastic wrap over your brows [because] it creates a heat that sets the solutions faster, but it also can cause a more severe skin reaction," Von Freudenberg says. Be wary of leaving the solution on for too long, as it can cause breakage, and always refer to the kit's instructions for the optimal time period. Hoffman recommends erring on the side of caution and starting with less time. If you’re not getting the exact results desired, increase the processing time for the next lamination treatment, which should be about six weeks after your initial one.
When the processing is finished, wipe off the solution with a cotton ball or follow the instructions recommended in your kit.

How to Care for Laminated Eyebrows
Eyebrow lamination looks its most extreme within the first 24 to 72 hours after the process, Hoffman says. She recommends not doing the lamination a day or two before an important event, since the brows will look less relaxed. Then follow her key tips to maintain your newly-shaped brows:
Keep them dry. While you should follow the directions on your kit, most brow lamination kits suggest not getting your brows directly wet for a minimum of 24 to 72 hours.
Condition the hairs. Since the process involves chemicals, it can be very dehydrating to the hair. Apply a brow moisturizer or oil to the brow hairs nightly. If the kit doesn’t provide one, a natural oil like castor oil will do the trick.
Brush them daily. You should also brush your brows into place every day, as they will become displaced when you sleep. “The longer that the hairs are out of place, the more they're being pulled back into their natural shape,” Hoffman explains.
You Might Also Like
