
Turn That Ugly AF Laundry Basket Into Pretty Decor In 3 Easy Steps


I don't know about you, but it's hard for me to justify dropping $70 on a decorative bin, no matter how useful it is. (There's just too much other fun stuff to spend money on!) One thing I can get behind, though, is transforming a super-basic item into something that's both practical and incredibly pretty. Take the humble laundry basket. You can find one for next to nothing, and once you cover it in some colorful cord, picking up dirty clothes or stashing blankets gets a whole lot chicer. Best of all: no artistic ability required whatsoever.
Step 1: Gather the Materials
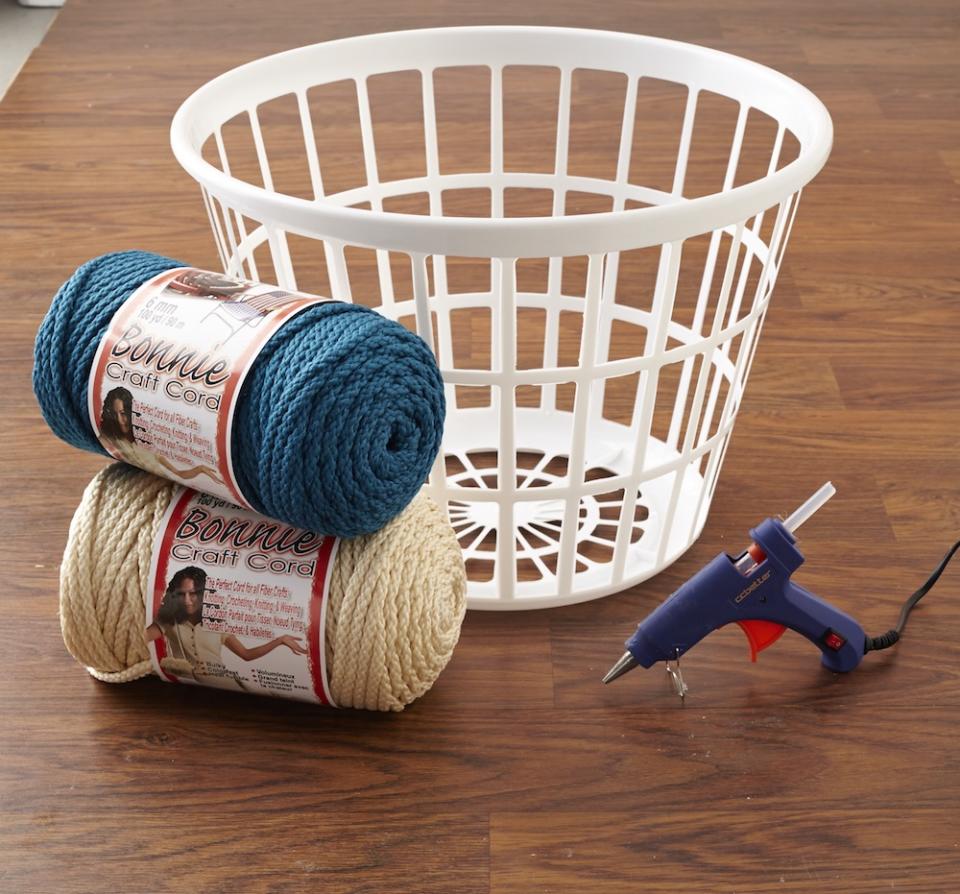
Snap up a round plastic basket at your local dollar store. (You'll want to buy one without handles.) Next, pick up two different colors of cord, each about 1/4-inch thick (this is Pepperell Craft Cord, starting at $7.99 for 100 yards; walmart.com). I like the two-tone look, so I chose teal for the top half and a natural hue for the bottom. Grab a hot glue gun and glue sticks and you're ready to go.
Step 2: Start With the First Color
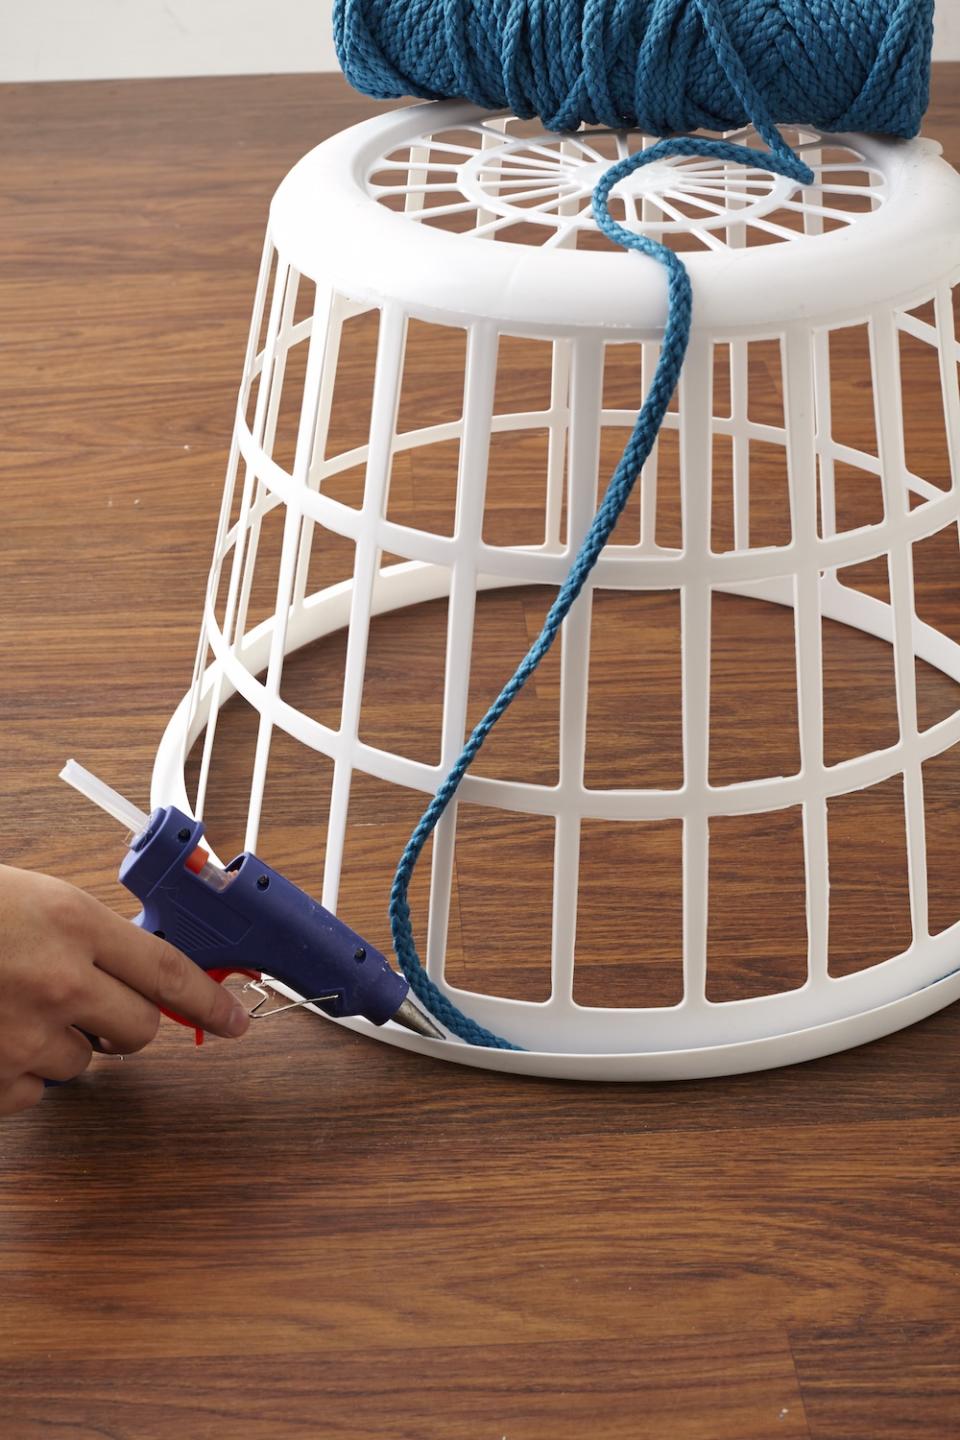
Flip the basket upside down. Using the glue gun, apply glue under the lip of the basket all around, and adhere the cord before it dries. After the first go-round, apply glue to the edge of the already-attached cord; you'll then bond the tiers of cord together like a sandwich, ensuring they're nice and tight. As you wrap around the basket, also dab glue onto the cross sections of plastic.
Step 3: Add the Second Color
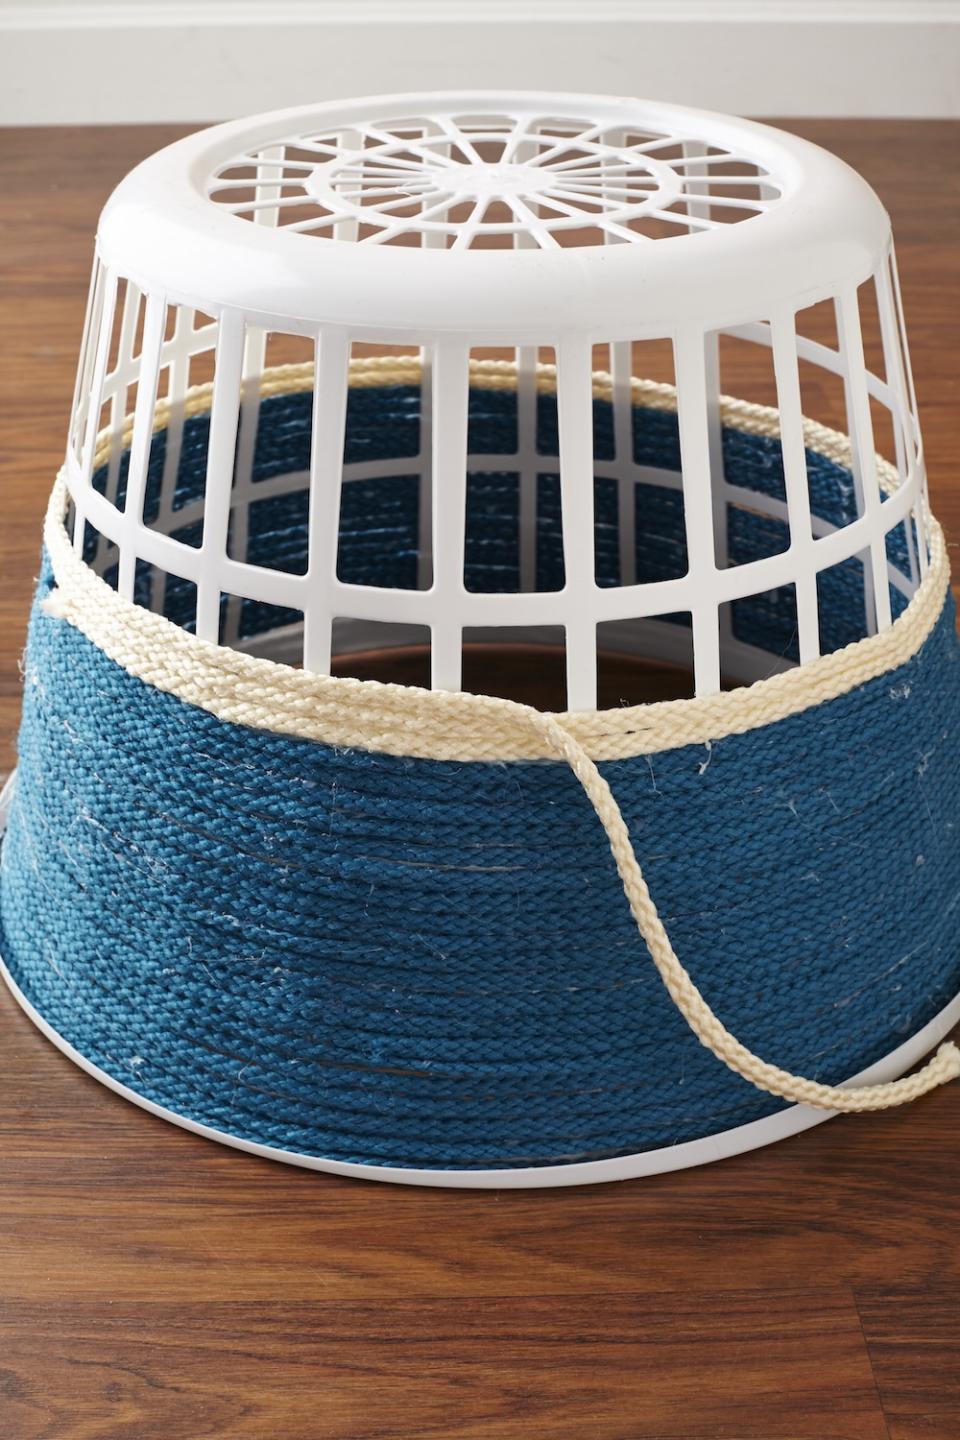
At the halfway mark, cut the cord, give it one final dab of glue on the tip, and adhere it firmly to the tier below it. Take the second cord and, making sure its end is flush with the first cord, repeat the gluing-and coiling process until you reach the lower edge of the basket. (There's no need to cover the bottom or the interior.) Lastly, wrap the top lip of the basket in the first color. That's it!
You Might Also Like

