

Genius! Hamster Wheel Desk
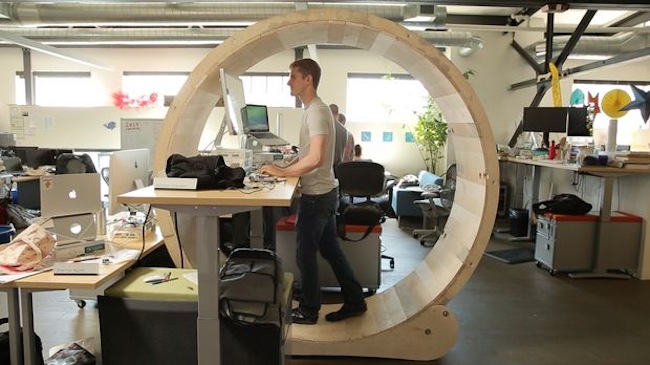
There are DIY desks, and then there are D-I-Y desks. We learned that when we came across this so-called "hamster wheel standing desk" co-created by Autodesk's Pier 9 Artist-in-Residence Robb Godshaw and Instructables developer Will Doenlen. It certainly looks like it's fun to use—but why did they do it? We asked the makers to share.
As Will put it, "Standing desks are becoming more and more common in companies across the United States, but why stop there? We know that standing is better than sitting, but why not go the extra mile and make a desk you can walk on to keep active?"
But building the walk-able desk wasn't a cake walk. "Cutting large curves from wood is difficult to do precisely," said Robb. "Luckily, our employer has a world-class work shop on San Francisco's Pier 9 that has advanced computer controlled cutting tools that made it quite trivial."
In fact, Autodesk's Pier 9 sounds like the place to be for the pro DIYer. According to Robb, "The facilities and tools here are only trumped by the incredible community of brilliant and generous makers of every kind" who "come together to make incredible things everyday." We're glad their creative ingenuity cooked up a project as cool as this one.
The desk looks truly amazing—but we had to ask. Does anyone actually get any mileage out of it? Will says yes, but admits that sometimes he'll "switch to using a normal desk to rest when I get tired of walking."
MATERIALS AND TOOLS
- (4) Sheets of ¾" Plywood
- (4) Skateboard wheels
- (2) Pipes
- 240 wood screws
- Pint of glue
- Waterjet cutter (or jigsaw)
- Table saw
- Chop saw
- Clamps
STEP 1
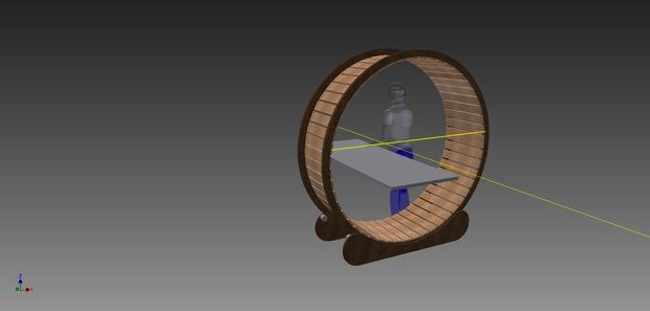
First, design your wheel. Things that are made to fit people are subject to lots of careful consideration. Ergonomics and safety are very important to any furniture project.
We considered adding in brakes but decided against it in order to really force the productivity out of the desk user. In the end, we decided on a wheel 80" in diameter that would be supported by a 24" wide base that contained a set of four skateboard wheels on which the wheel would rest. This design allows fluid rotation without requiring an axle for the wheel.
We already had a standing desk that fit through the wheel, so it was just a matter of avoiding interference and leaving enough room for a human.
The wheel was designed using Autodesk Inventor over the course of a few hours. See the files here.
STEP 2
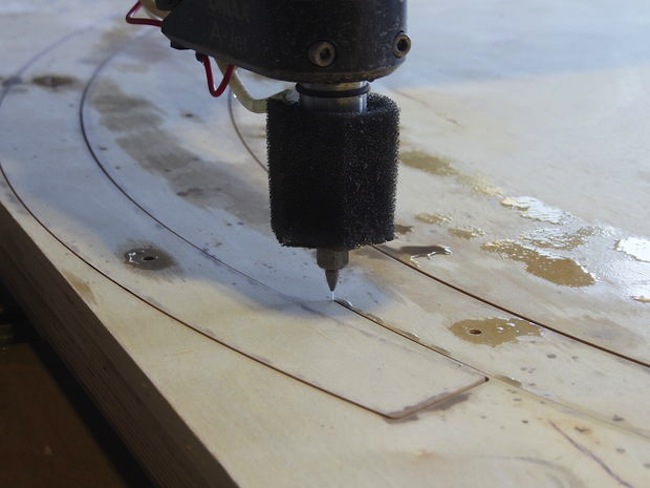
We used a waterjet cutter to cut the arcs from four sheets of plywood, but this project could certainly be completed with ordinary power tools.
The arc pieces are the hardest to make, as their precision is key to smooth operation of the wheel. A carefully measured string used as a compass could be used to draw the arcs on a piece of plywood, which could be cut with a jigsaw. A hand router with a template and a trim-bit would make duplication fairly straight forward.
However, we both work at Instructables HQ at Autodesk's Pier 9, and have access to a large OMAX waterjet cutter. It's a computer-controlled machine that uses a high pressure waterjet to cut through any material, as long as it is less than 6" thick. Wood, any metal, glass, stone—any material into any shape. You might think it crazy to cut wood with water, but it saved us many hours and saved a lot of wood because we could nest the parts within 1/8" of each other. Plus, the precision made for smooth rolling and perfect registration of the stacked pieces upon assembly.
STEP 3
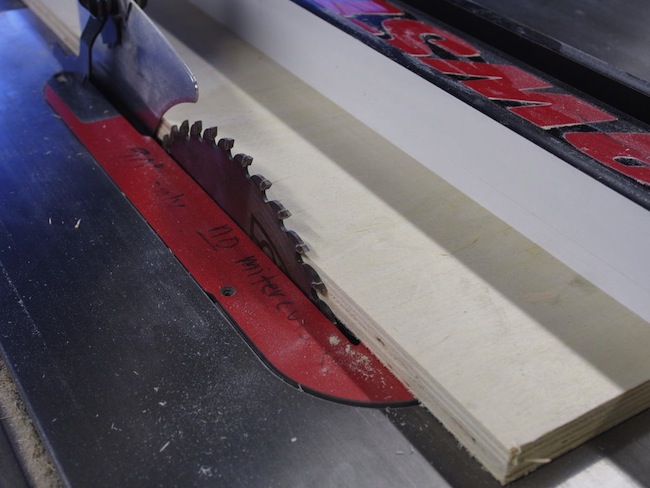
We used a table saw and chop saw to cut out the remaining slats of wood used to span the two rings of the wheel. There are 60-something slats in total. We used plywood because we had it on hand. 1"x6" pine would work great and look better, but cost more.
STEP 4

Lay out the rings. The wheel consists of two wheel rings with some 60-odd plywood slats between the rims.
STEP 5
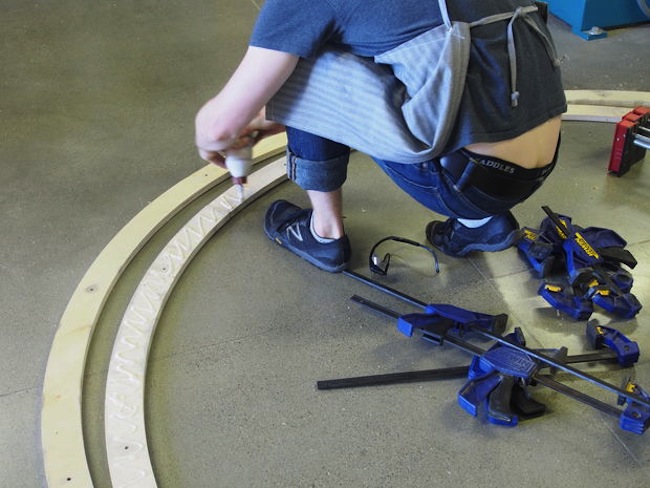
We then glued the layers of each ring together, staggering the two layers by 60° to maximize overlap and stability. Initial clamping was done with ¼"-20 cap screws and T-nuts, followed by about 20 clamps. Glue was wiggled out liberally, spread with a piece of paper, then clamped to kingdom come.
Pro tip: A sign of a good glue-up is squeeze-out, a small amount of glue emerging along the glue seam indicating complete dispersion of glue.
STEP 6
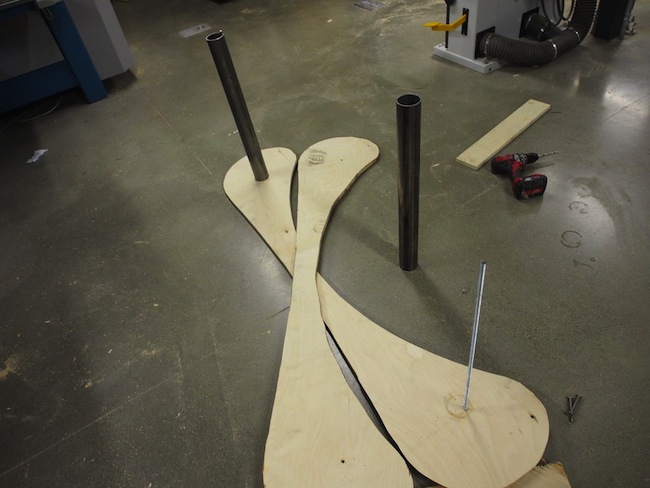
The base consists of two large, hot-dog shaped pieces of wood, each of which holds two skateboard wheels. The two plates are held together with 5/16" threaded rods inside steel pipes to pull the plywood sides together. The length of the pipe is key, and had to be changed a few times. Too short and the wheel won't spin, and too long and it wiggles too much.
The skateboard wheels were attached to the base using 5/16 cap screws with two fender washers and two locknuts. As shown in the image, the first locknut should be super-tight, and the second a bit loose to avoid damage to the wheel.
STEP 7
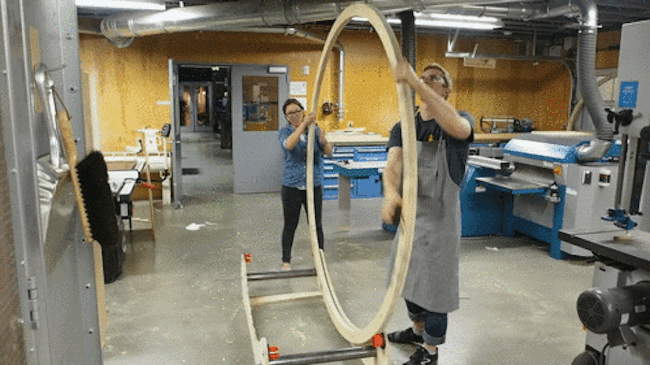
Once the base was assembled, we tested out the action of the rings on the base to ensure they spun freely and didn't hit the pipes or catch on jagged edges.
STEP 8
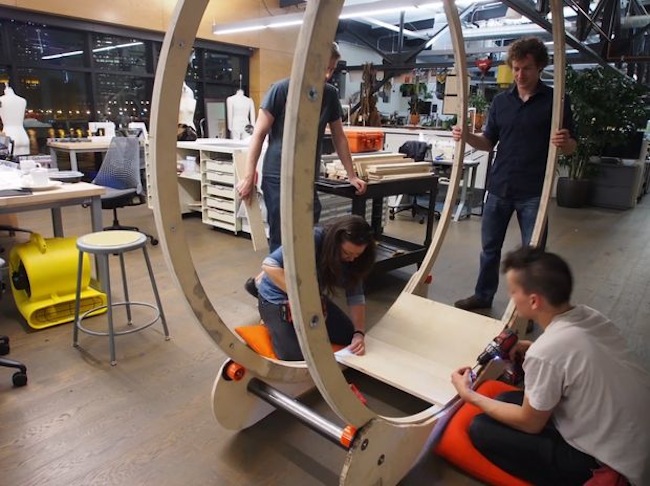
Satisfied that the rings could spin on the base, we then screwed the slats onto the wheel. This part was tricky—we had to redo it several times since we found the distance between the two rings of the wheel would creep upwards or downwards as we attached more and more slats. The solution was to screw in a couple of pioneer slats at strategic 90° intervals along the rings in order to maintain a fixed distance between the rings as we attached the slats.
It took five of us working together for several hours. We went through approximately 250 screws total, or about every screw we could find in the wood shop.
Did you like this project? Then check out some of Robb's other work, like this set of steel clamps in the shape of the alphabet, or find even more pictures of this one right here.
Related Articles

