
How to Hang Curtains: A Hassle-Free 5-Step Guide

Illustration: Ellie Schiltz/Getty Images
It might sound like a simple enough task, but there’s a learning curve when it comes to how to hang curtains. Though it’s easy to think you’ve mastered it, something that takes up so much wall real estate warrants a closer look. “Besides the more obvious visual indicators, like a crooked rod or curtains that are shorter than the window, it’s not always apparent you are hanging them wrong,” says Bobby Berk, interior designer and Emmy Award–winning TV host. “It’s easier to know what’s wrong when you can compare it to the right way; then you will be able to see they are not full enough, or too long, or the rod is too low.” Much like sourcing the right-size area rug for a room or hanging framed artwork at the appropriate height, you can get by with what you perceive to be correct until you’re shown how an expert would do it.
And while you could be strictly utilitarian about curtains (which is to say, as long as they block out an early sunrise you’re satisfied), balancing utility with aesthetics can only benefit you. “Curtains can enhance a space by making windows appear larger and ceilings higher,” says interior designer Katie Hodges. “They filter light and add lushness like nothing else can.”
Read on for a step-by-step guide—complete with styling advice—on how to hang curtains.
How do I hang my own curtains?
1. Gather your tools and materials
First things first, gather up everything you need to hang curtains, including:
Curtain rod and hardware
Wall anchors (if needed)
While it’s possible to hang curtains on your own, tackling the task without a helper will probably make the whole process a bit more challenging. “It’s helpful to have a second set of hands to help assist with placing the rod on the brackets and adding the curtains,” Berk says.
2. Take measurements using measuring tape
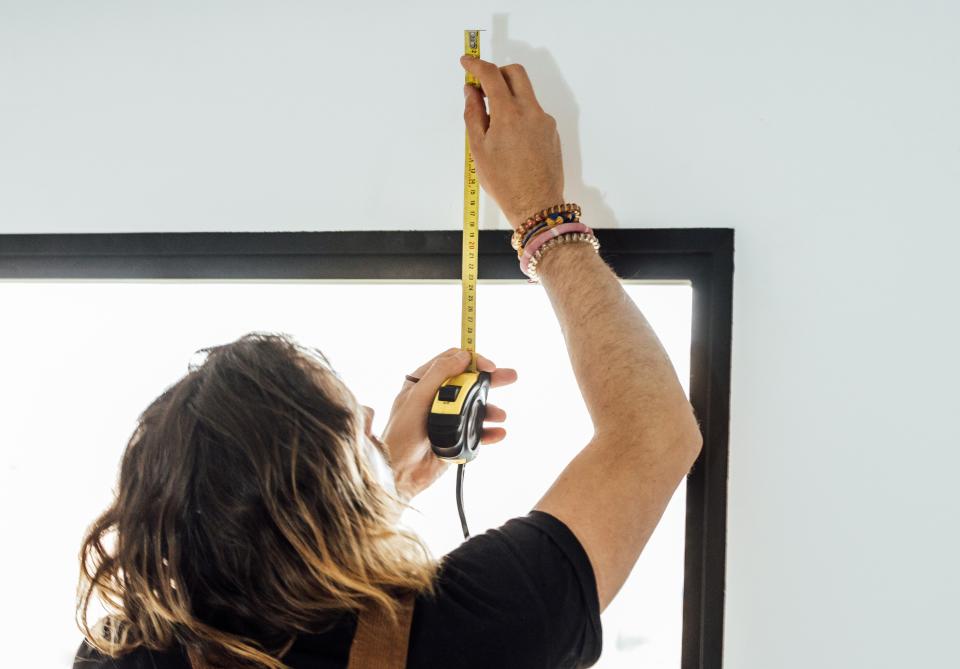
To get started, jot down the width of your window using your tape measurer, including the window trim. “You will then want to add an additional 8 to 10 inches to each side to get your total width measurement, and that number will also be the length of your curtain rod,” Berk says. For a full look of curtains that slightly overlap with the glass—which Hodges and Berk both recommend—Berk suggests drapery that’s twice the width of the window and rod. So, multiply your width measurement by two to get the total width of both curtain panels.
To get the height measurement for the curtain length, don’t just start your measurement from the top of the window. You’ll want to place the tape measure either right at the ceiling or right below the bottom of the crown molding and then stretch it down to the floor. “Depending on the type of brackets being used for the rod and the curtain style you chose, you may need to deduct from this total to consider any distance the rod will sit from the ceiling or where the curtains will hang. Rod pocket curtains will generally hang higher than curtain rings or a pinch pleat style,” Berk notes.
3. Decide where to place the rod
Hodges says that it’s best to determine which type of curtain style you’re after in the measurement phase, since it will determine where the rod will hang and how much material is needed. “In the initial measure, my team and I figure out whether we need middle brackets, C-rings, poles, and lining,” she says. “Generally, rods are mounted generously above the window but not so high that it looks distracting.”
A good rule of thumb is to hang the curtain rod closer to a standard-height ceiling (eight to nine feet) than the window frame, since doing this will make the window and ceiling look taller. “The only exception would be if you have incredibly high ceilings and don’t need that optical enhancement,” Berk says. “Then you can hang them directly above the window frame.”
As for the length of the rod, Berk recommends it to be 16 to 20 inches longer than your window, unless your window extends wall-to-wall. This will create the appearance of a larger window.
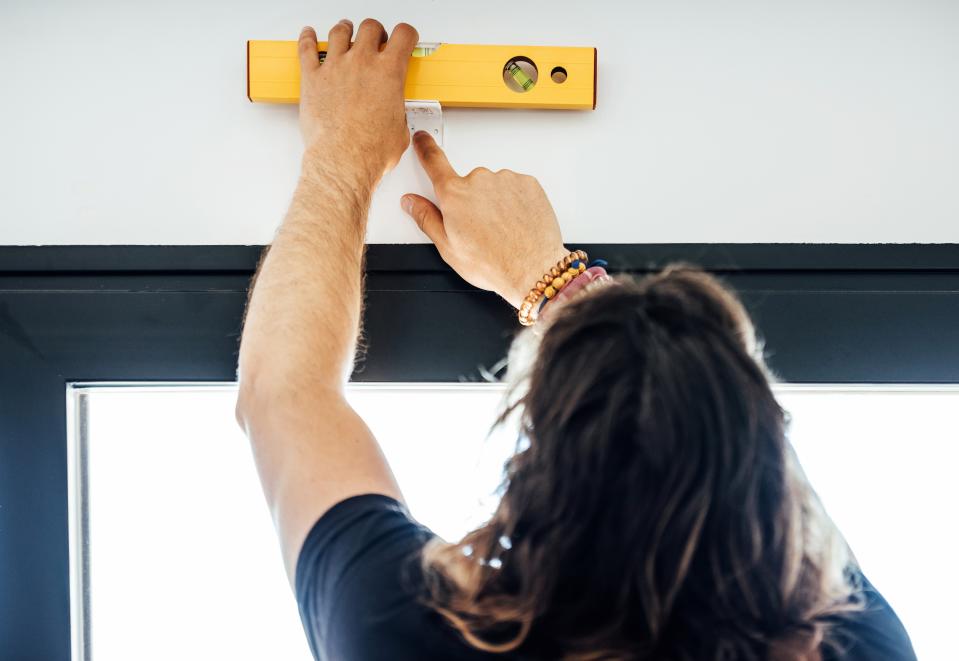
4. Install the brackets
Next, use a pencil to mark the drill holes for your curtain rod brackets. Each bracket should be placed at the height you previously determined and about four to six inches from the side of the window frame. This will allow you to open the curtains completely.
Check to make sure your pencil marks are level, because otherwise the entire window treatment will be crooked. Use a stud finder to see if your brackets line up with studs. If they don’t, you’ll want to install wall anchors after drilling the holes. Drill the holes and then screw the brackets into the wall.
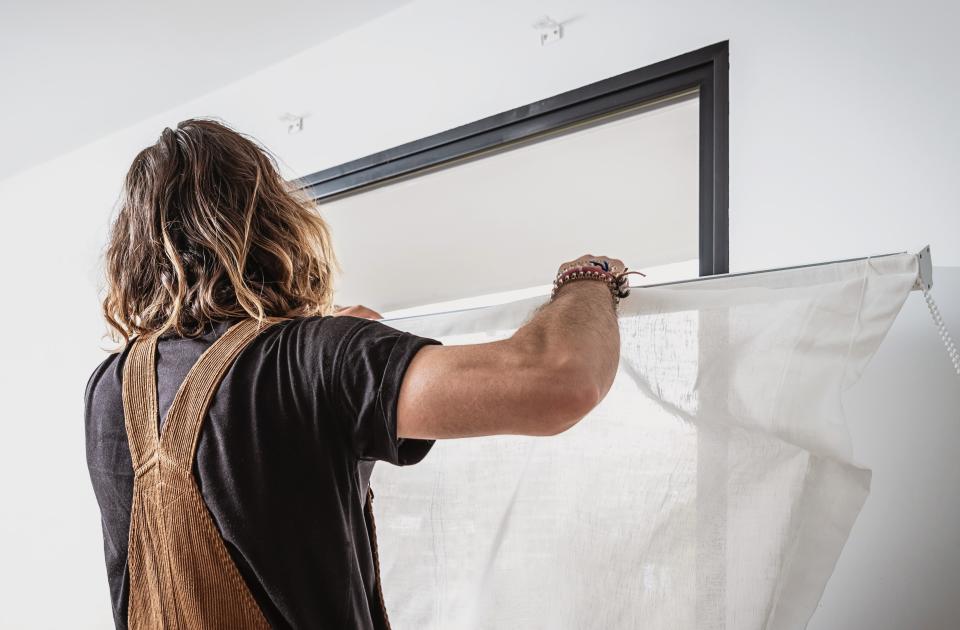
5. Put up the rod and hang the curtains
If your curtains are coming straight out of a new package, iron or steam the creases and wrinkles out. Remove the finials from the curtain rod and thread the curtain onto the rod. Depending on the type of bracket, you may need to place the rod into the bracket before replacing the finial. Your bracket may have set screws to keep the rod in place, so you’ll want to tighten them once the rod is installed.
How should I style my curtains?
Getting your curtains up is just the first step. We asked professionals for help in how to style curtains so they enhance the look of your interior space.
When in doubt, pick familiar fabrics
While a wide-range of fabrics can be made into curtains, Berk says that cotton and linen are his go-to choices, as “they can be dressed up or feel more laid-back, and you can add a lining to make them opaque or blackout,” he says. “Velvet is also an option for a heavier look that also helps to create a cozy feel and dampen sound in a larger room.”
For other common fabrics, Hodges suggests a semi-sheer linen and wool blend for curtains because it drapes beautifully, offers some fullness, and isn’t as wrinkly as 100% linen.
What fabrics should you avoid for curtains?
“I steer clear of silk or lace, unless you live in a palace or Victorian home,” Berk notes. Hodges says no to certain linens for the stretch effect: “The worst choice would be a medium-to-heavyweight linen that stretches,” she says. “When they are installed, they stretch a ton.”
And as for patterns? “I prefer to stay neutral, but I’d love the opportunity to go bold,” Hodges says. “Patterned drapes can be gorgeous, but eight times out of 10, I feel like they are most appropriate in a kids’ space or den, versus a main living area.”
Opt for a timeless design
“Making a decision on curtains that are somewhat permanent is daunting,” says interior designer Melissa Warner Rothblum, who runs the LA firm Massucco Warner Miller with partner Julie Massucco Kleiner. The big consideration: finding a design that doesn’t feel fussy and won’t go out of style. “People assume drapes are old-fashioned,” Kleiner says, “But they don’t have to be. Sewing multiple fabrics together for a custom look or adding tape trim for a unique pattern gives them a modern edge.”
When in doubt, go simple, suggests interior designer Haley Weidenbaum, cofounder and CEO of Everhem, a custom window treatment company. Understated pleats are one of her go-to ways to accomplish this. The styles that feel most timeless to her? Box, tailored, and pinched. Regardless of the space you’re searching to place new curtains, these styles can invoke a sophisticated yet relaxed feel. For a more casual contemporary look, she recommends box pleats. “Tailored pleats are best for a versatile, transitional space,” Weidenbaum says. “For a space with traditional design in mind, go with pinch pleats.”
Once the pleat style is selected, remember to train the pleats. “To train drapery, start at the top of the drapery panel and use your hands to gather all the pleats neatly together,” Weidenbaum says. “The pleats allow the fabric to fold nicely at the top and should lay flat. Any excess fabric or lining should be folded back into the wall between the pleats. Be sure to follow the fold of the pleats down to the bottom of your panel by carefully guiding your hand along the creases. Then secure with a thick ribbon loosely tied approximately one quarter of the way up.” After a day or two, your new curtains should be ready to go—and will hang wonderfully.
Don’t overcomplicate your curtain rod
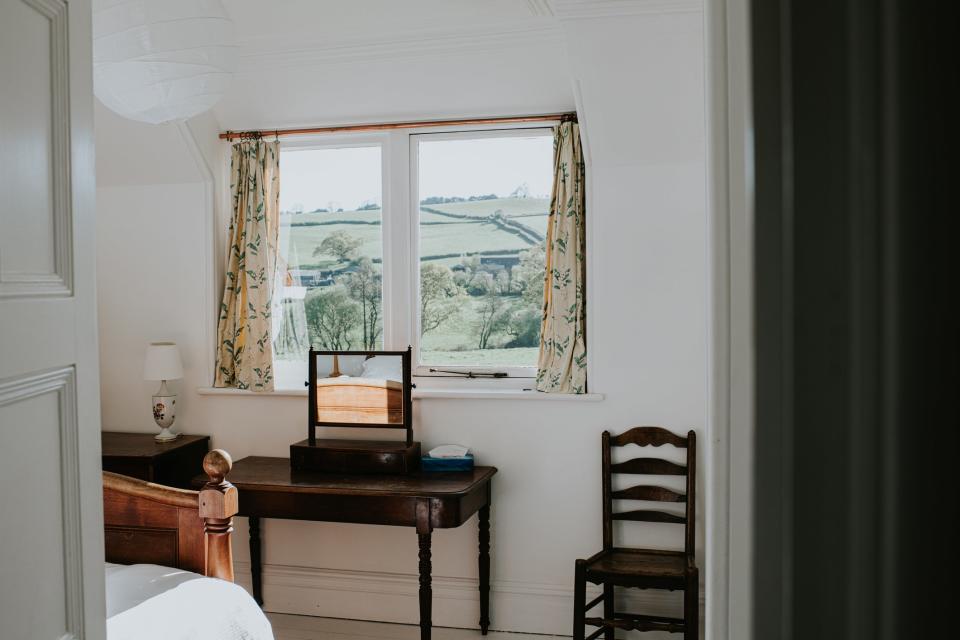
A stylish, tidy bedroom painted white, with a beautiful countryside view
“My preference is for the rod to not overshadow the drapes,” Hodges says. “I like a delicate 3/4-inch rod with horizontal middle brackets, if possible.”
Berk agrees that the curtain rod should be simple, since anything overly decorative tends to look too fussy. One way to make the decision easy is to match the rest of the hardware in the room. “If you have black door handles and cabinet pulls, then black is a great choice. If your style is modern, go clean and minimal,” Berk suggests. “If it’s traditional, you can choose something more classic.”
Should curtains touch the floor?
This might be a contentious subject, but per our pros, the bottom of your curtains shouldn’t pool—which is why you should take careful measurements at the beginning of this project. Hodges and Berk agree that the bottom of the curtain should “kiss” the floor, which means that it should ever-so-gently touch it. “This looks clean and natural, but also provides some allowance for when the draperies grow and contract, such as when there’s a lot of humidity in the air,” Hodges says.
To make sure that you don’t make the mistake of too-long curtains, Berk recommends deducting one half inch from the total length of your curtain measurement on both sides while also keeping the height of the rod and your intended style in mind. “Linen tends to stretch one to two inches over time, so you will want to deduct that additional amount from your curtain height if you opt for that fabric,” he says.
If you’re a renter, consider inside or outside mounted curtains
Renters, you’re not excluded from this curtain makeover project, either. There are less invasive hacks to this DIY, like using a tension rod or adhesive hooks. It might be easier to kick off conversations with your landlord before going down a tutorial rabbit hole on learning how to hang curtains without drilling.
“Fortunately any holes made into drywall are very easy to patch and paint,” Weidenbaum assures. Outside mounted curtains require two to four screws placed on the drywall above your window, whereas inside versions require the screws placed—you guessed it—inside the window frame. Looking to show off architectural details of the window? Inside mounts might be your best option.
Weidenbaum advises opting for outside mounted blinds if your windows are on the shallow side.
Coordinate your hardware with the curtain fabric and the room’s existing metals
Your rods and finials should complement your curtains. Heavier curtains call for more substantial rods while sheers can be placed on slimmer rods. If you have metal accents elsewhere in the room, such as a gilded pendant light or brass-framed coffee table, consider a similar material or finish for the curtain rods or finials.
Originally Appeared on Architectural Digest
More Great Stories From AD It Yourself
47 Kitchen Organization Ideas That Declutter Cabinets, Countertops, and More
The Cringiest DIY Trends According to TikTok’s Favorite Designers, Decorators, and DIY’ers
How to Propagate Pothos Plants at Home: A Step-by-Step Guide
Not a subscriber? Join AD for print and digital access now.
Browse the AD PRO Directory to find an AD-approved design expert for your next project.

