
Pork Roast Cooking Tips You'll Wish You Knew Sooner
You can make a better pork roast if you know just a few extra cooking tips. When you've spent the money for a good pork roast, you want it to turn out delicious and have the texture you've been craving. So, if you want juicier, more flavorful, more evenly-done, and softer meat, as well as a crisper or even crackling crust, this is for you.
Of course, it's important to pay attention to detail. The procedures you should use depend on the cut of pork you're roasting and the outcome you want. Mix and match these tips to get exactly what you want. Just be sure to plan accordingly if you choose different methods that may require extra time.
We've included a variety of pork roast tips with explanations about when to use them and why. The end product should speak for itself. Even if you've been roasting pork for decades, that one tip you didn't know might make all the difference between results that are just okay and pork roast glory.
Read more: Cuts Of Steak, Ranked Worst To Best
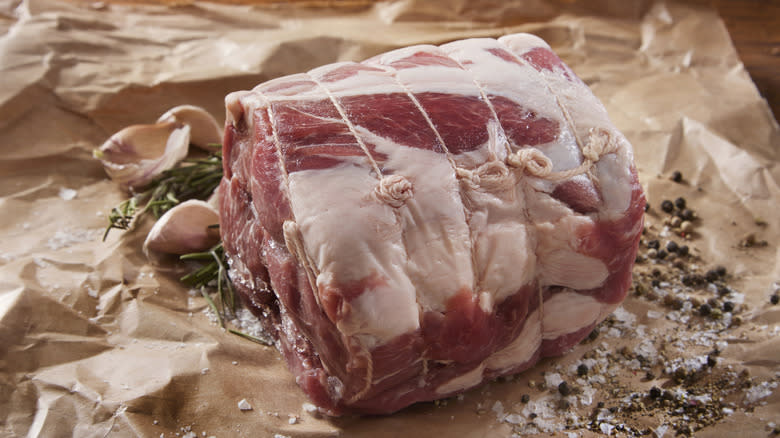
Use The Right Pork Roast Cut And Recipe For A Juicier Roast
One recipe doesn't fit all since there are many parts of a pig that you can roast. Some parts that are best for roasting include pork butt, pork shoulder, blade-end roast, center-cut loin, tenderloin, sirloin, and crown roast. Overall, the size, type, and fat content of your pork roast make a big difference between whether your recipe turns out moist or dry.
The size of your cut dictates how to choose the right temperature and cooking time for your meat to stay juicy. Bigger and tougher cuts need lower temperatures and longer times, while smaller more tender ones can cook more quickly at higher temperatures. Often, cuts labeled as roasts or butts need lower and longer cooking times than ones labeled as tenderloins. For best results, consult a recipe for your specific type of pork roast rather than one that uses the generic term "pork roast."
Something else to consider is how much fat is in your meat. Fat contributes to tenderness, flavor, and especially juiciness in a pork roast. Lean cuts may need extra help to keep from becoming too dry. Thus, it's a good idea to pay extra attention to moisture-producing cooking methods (like brining and stuffing) for leaner cuts like pork sirloin roasts than for fattier and well-marbled cuts like pork blade roasts (although they can benefit from similar methods, too).
Lose The Chill To Ensure Your Meat Cooks Evenly And Stays Juicy
A good pork roast takes time. Part of that time should include how long it takes to get it to room temperature. When you're trying to determine how long it will take to make your roast, don't forget to factor in extra time for the meat to lose its chill once you take it out of the fridge or get it home from the grocery store.
The process of getting it to room temperature depends on how you've stored the meat. Per the USDA, a frozen roast should thaw out in the fridge for 24 hours for every five pounds rather than on the countertop. When taking a chilled piece out of the fridge, keep it on the countertop long enough to get to room temperature. Smaller roasts may only take 30 minutes to an hour, while larger roasts may need more time. Be sure tokeep the time below two hours to avoid the pathogen danger zone of 40 to 140 degrees, where disease-causing bacteria can grow. While the meat loses its chill, it needs to stay covered in a cool place. Avoid putting it near an already-warm oven.
When the meat starts with a more even temperature throughout the cut, the finished product will be more evenly cooked. Plus, it will be juicier inside because areas of the meat closer to the surface won't get overcooked while the center gets to the right internal temperature.
Sear Your Meat To Make It More Flavorful
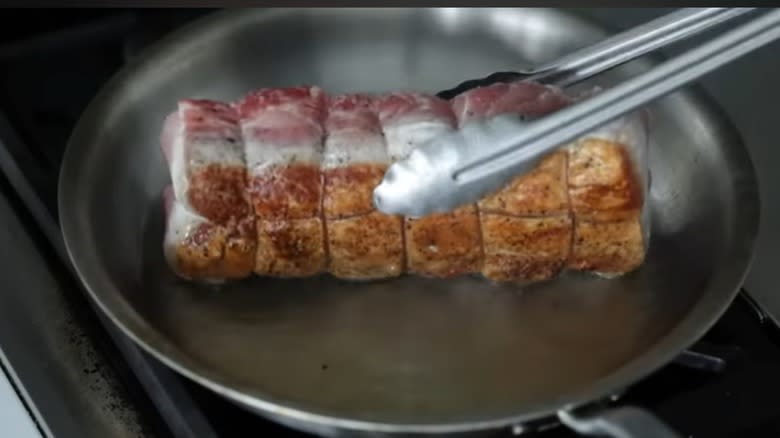
When it comes to pork roasts, searing is often important before roasting. However, some misconceptions about searing have persisted since the mid-1800s. A German chemist named Justus von Liebig declared that searing meat makes a barrier around meat to keep moisture in. Numerous studies since then have shown that the idea is a myth, given that the seared layer is not waterproof. However, searing meat does provide a richer flavor.
If you cook the outside of your pork roast quickly at high temperatures, it undergoes the Maillard reaction and browns. The meat would undergo this reaction to some extent in the oven as the temperatures rise, but browning all sides of the meat before roasting will ensure that it has a richer, more complex flavor all around rather than just in the spots that brown in the oven. This is especially true with smaller pieces of meat that have shorter cooking times.
To get the best sear, pat the meat dry first to eliminate as much moisture as possible from the surface. Sprinkling on a little salt right before patting and searing can help bring more moisture out. Each side of the meat needs to sear in oil in a hot pan for a couple of minutes before turning the roast. You're done when as much of the surface of the meat is brown as possible.
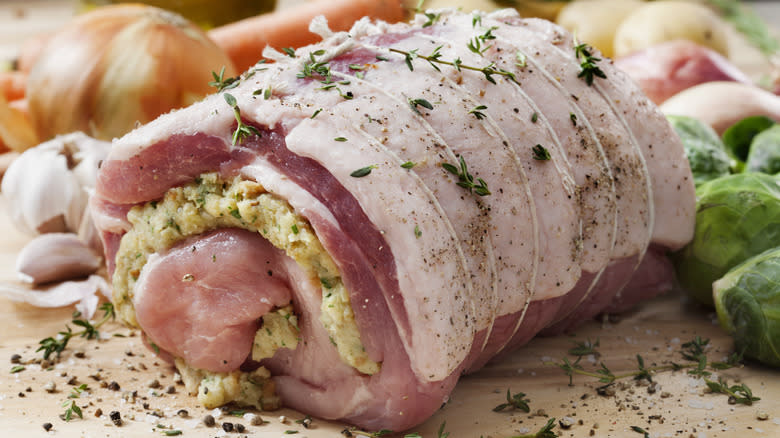
Stuff Pork Loin Or Tenderloin Roasts To Provide More Internal Moisture
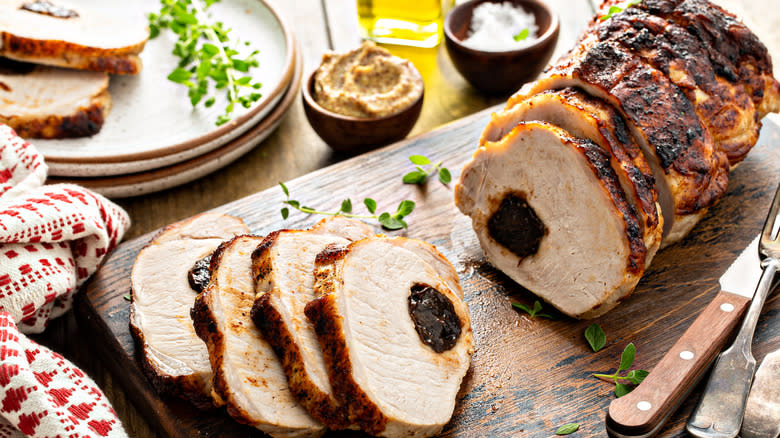
You don't have to rely on the meat itself to provide moisture for your pork roast. If you're roasting a pork loin or tenderloin, you can stuff it with other ingredients to help increase the moisture.
Choose ingredients with naturally high levels of moisture to achieve the best results. For example, prepared bread-based stuffing or fruits to place inside a roast, either of which can help add to the juiciness factor.
There are three main ways people stuff tender cuts of pork before roasting. The easiest method is to slice the meat longways down the middle, add the stuffing to the center, and then truss it up to keep it together during roasting. It's also possible to create a tube-shaped hollow in the middle of the meat. If you have an impressively sharp knife and good kitchen skills, the prettiest way to stuff it is by filleting the roast so it opens into a uniformly thick and flat piece. Then, top it with your stuffing and roll it into a spiral to truss and roast.
Brine Your Pork Roast To Make It Juicier, Softer, And More Flavorful
Brining is something you can do ahead of time to achieve juicier, more tender meat. Brining with a salt solution is especially valuable if you're roasting a leaner cut of pork rather than one with lots of fat marbling. The results are not only juicier, but the meat will be more tender and better seasoned.
The salt in the brine penetrates into the meat to help change the structure of the proteins so that it can hold liquid better. The structural change in the proteins also helps to tenderize the meat.
Brine the meat in the fridge for no more than two to three hours. It's important to note that overly salty brine can draw moisture out of the meat instead of adding to it. A good brining recipe is 2 quarts of cold water to a fourth cup of table salt. Some people first boil the water to melt the salt and then cool it with ice water before adding the meat. While that proportion may seem like a lot of salt, it adds very little total sodium per serving, at least as long as you don't let it soak longer than it should. For extra flavor, add other seasonings like herbs to the brine.
Know When To Cover (Or Not) To Get Moist Or Crisp Results
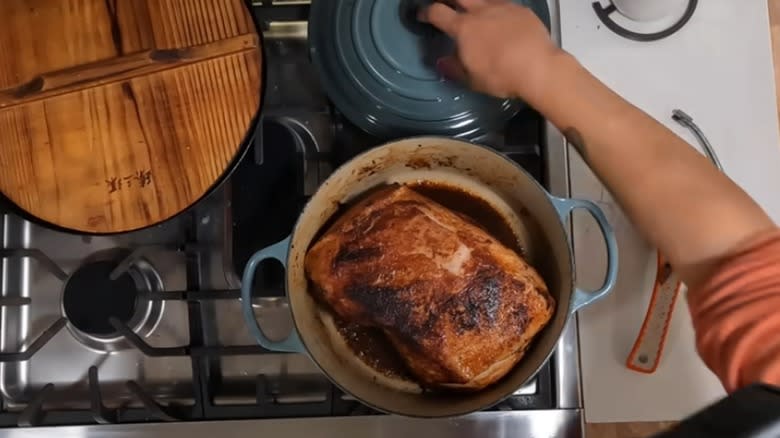
Should you cover a pork roast with a lid or foil? The answer depends entirely on the results you want. If you want everything moist and juicy, you'll want to cover it. If you want a crispy exterior, don't cover it. Sometimes, you might want to do a little of both.
Covering pork roast is fine if your goal is moisture in and out. Covering a pork roast with a lid or foil helps to keep moisture in and contributes to the cooking process with higher temperatures inside the covered pan. Keep in mind that it creates a wet roast because a covered pan creates its own steaming or braising microcosm to keep recirculating the moisture in the dish. If you peek into the oven and find that your meat is getting a little too brown before it's done, covering it loosely with room for steam to escape can be a good option to keep it from scorching.
However, if you want a completely crisp outside layer, leave your pan lid-free and foil-free. If you're cooking a roast for something like pulled pork and want it to be super moist but also have a few bonus crispy ends, you can always cook it covered for most of the time it's in the oven and then uncover it during the last 45 minutes to an hour to develop a crisper exterior.
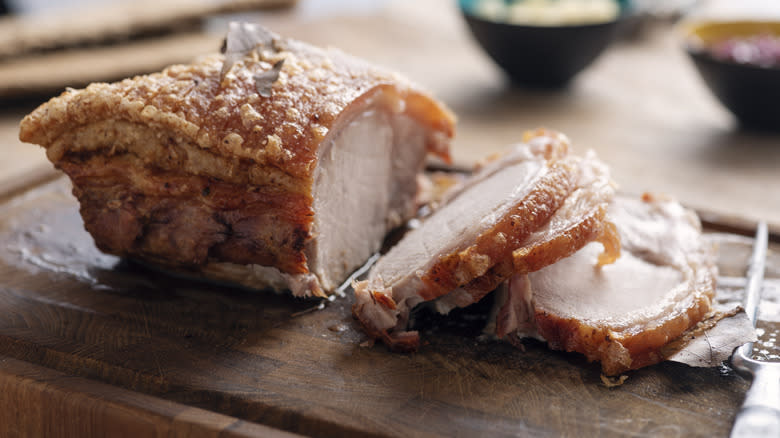
Score, Dry, Salt, And Oil The Rind For A Perfect Crust
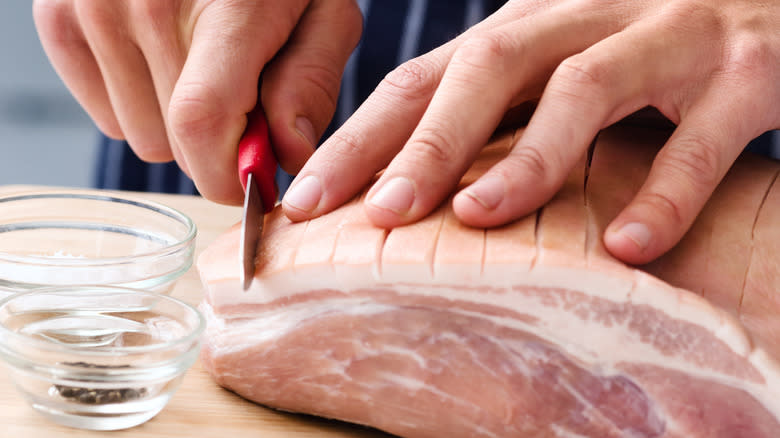
If you want the exterior crust of your pork roast to feature crisp crackling, there are a few things you should do to prepare it. Not only does it need a thick layer of fat to crisp, but you should take care of the fat in a specific way.
Since external moisture is one of the biggest enemies when trying to create a crispy crackling exterior, start with a dry exterior. If you're storing it in the fridge before cooking, keeping it unwrapped can help keep it dry. You'll also want to pat it dry with a paper towel before getting it ready for cooking to make it even drier. One pork roast hack that seems to work extremely well is to use a hair dryer to get the outside extra dry before cooking.
The next thing you need to do is to pay attention to the rind and fat layer. Score the rind horizontally and vertically in a grid pattern. It's important not to cut into the meat itself to keep the meat juices inside. Scoring gives you a way to massage oil and salt into the skin to enhance the crisping process. Another great hack is to pour hot fat over the rind instead of massaging oil into the cracks.
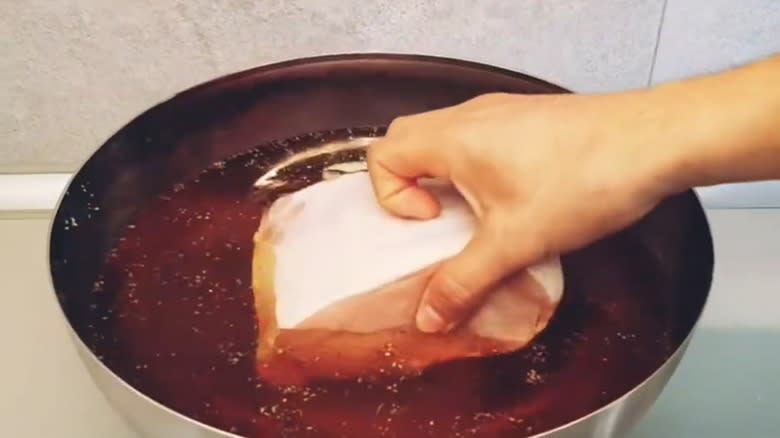
Pour Boiling Water Over It For The Best Crackling Exterior
There's an extra step some people take for a great pork-cracking exterior that sounds like it contradicts keeping the rind dry: Pouring boiling water over the meat before roasting. Since you must start with a dry piece of meat, some cooks suggest pouring the boiling water over the meat the day before you cook it to give the meat time to dry out again in the fridge.
The boiling water hack helps pull the rind away from the fat. The trick is to score the rind first. Then, the rind can pull away more easily from the fat layer to allow the salt and fat to more efficiently reach the interior of the roast. All you need to do is quickly pour boiling water over the scored pork, making sure the rind has good contact with the boiling water. Then, dry it again before cooking.
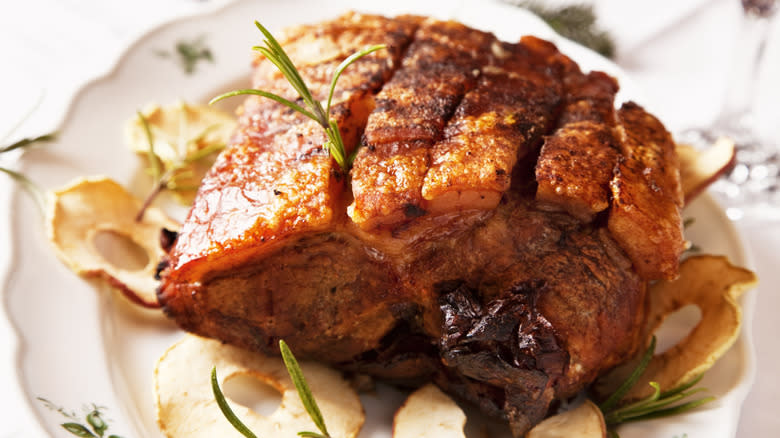
Roast With The Fat Side Up For More Moist And Flavorful Results
If you buy a fatty piece of pork to roast, don't cut off the outer fat layer because fat adds to the overall tenderness, flavor, and juiciness. If there's more fat on one side of the meat than the others, the placement of the fat during the roasting process matters.
When you think about the nature of fat and how heat causes many varieties to melt from a solid or semi-solid into a liquid, it makes sense as to why it's best to position the meat so that the fattiest side is on the top. As the fat melts, it can soak into the meat and drip over the more lean sides of the cut, providing extra flavor and making the meat a little more tender. Best of all, it will help to keep the meat from drying out. Some cooks like to go a step further and cover the exterior of their pork with a layer of oil before roasting, which is especially helpful with more lean cuts.
On the HowToBBQRight Podcast on YouTube, barbeque pitmaster Malcom Reed says "I'm cooking [pork butt] fat up if I'm scoring it ... because I like the way that fat kind of renders down and makes these little bites that are delicious. And you can pull them out like little plugs and eat the fat. ... It makes these little nuggets and bites."
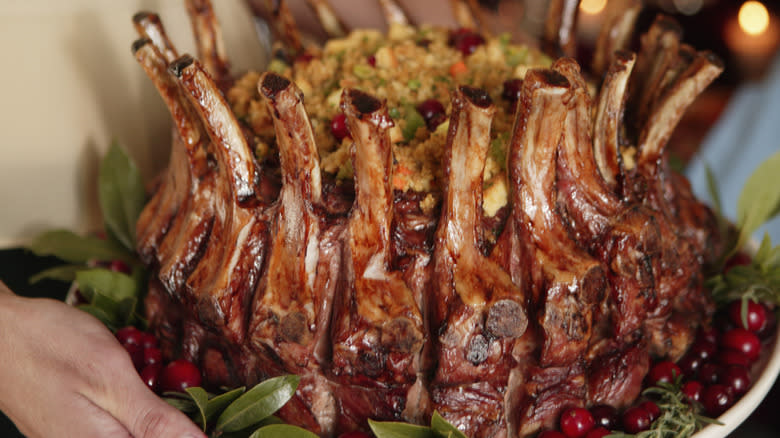
Cook Your Pork Roast Low And Slow For Softer, More Evenly-Done Meat
There are several good reasons to roast pork low and slow, especially if you're managing larger cuts like a crown roast or pork butt. Done right, this method results in a more consistently done, tender, and juicy piece of meat.
Roasting at a low temperature for longer periods ensures the meat will get done more evenly. It also helps make the meat more tender by breaking down slow twitch muscles -- especially prevalent in pork shoulders or pork butts -- that make the meat tough. Low temperatures help buy that extra time, while also allowing for slower collagen breakdown and less moisture loss.
Of course, different results happen at different temperatures, so think carefully about what you want on the table. For instance, while you'll lose some moisture cooking at 375 degrees Fahrenheit, you'll get a crisper crust than if you roast it at 250 degrees. Lower temperatures also mean more waiting. For example, a pork shoulder that needs three hours at 375 degrees requires eight to nine hours at 250 degrees. In our low and slow pork butt roast recipe, our 15-pound roast takes six to nine hours to cook at 250 degrees, but would only take five to six hours if it had been a 2 to 2.5-pound roast. Choose your method based on the size, wanted results, and the amount of time you have.
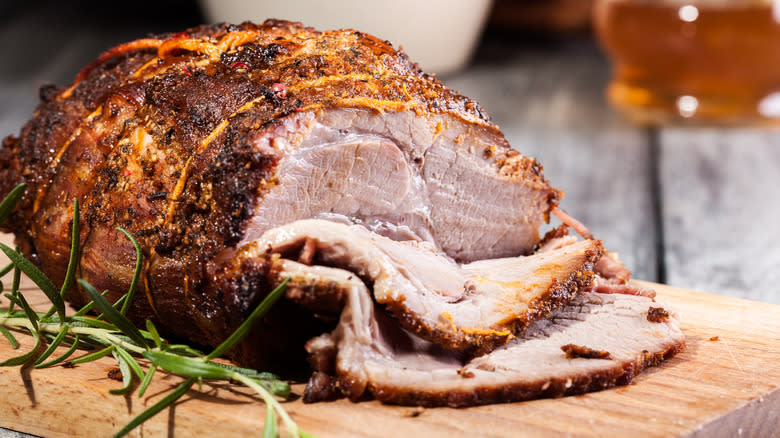
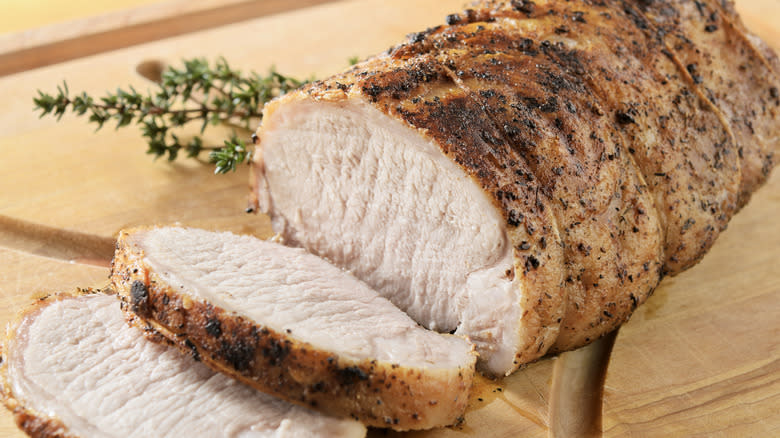
Let Your Pork Roast Rest Before Cutting To Make It Juicier
No matter what other tips you choose to use, don't skip resting the meat if you want it to be moist and juicy. The amount of time depends on the size of the meat and how well you want it done.
When meat rests, the proteins relax and have time to release the liquid back into the flesh of the meat. However, if you slice the meat immediately, a large amount of that liquid is going to end up pooled on the serving dish or in your plate instead of having time to be absorbed back into the flesh where you want it.
A pork roast needs about 15 to 30 minutes of resting time, though the USDA says that three minutes is the bare minimum. That exact time depends on the size of the roast, especially if you want to serve the meat hot. While it rests, it will still keep cooking. This means that the temperature it's at when you stop roasting it and the temperature it's at when you stop resting it are both important. For medium-done pork, stop roasting when the internal temperature reaches 140 to 145 degrees Fahrenheit. Stop resting it when the internal temperature reaches 150 degrees (the USDA says 145 is minimal for safety). For well-done pork, stop roasting at 150 to 155 degrees and stop resting at 160 degrees.
Reverse Sear Pork Roast For A Crisp, Browned Crust
When you're making a roast without a crisp crackling layer but still want a browned crust, reverse searing is your friend. Searing before you put the meat in the oven is the way most of us have been making meat. However, doing it afterward with the reverse sear method allows meat to cook low and slow or covered and still get a crisp and well-browned exterior.
The reverse searing process should happen after roasting and after resting the meat. You could conceivably decide to do a reverse sear just a few minutes before the roast goes to the table if it's not as crisp as you'd like it on the exterior.
All you have to do is put the roast back into a 475-degree oven on an uncovered and clean baking sheet for 13 to 17 minutes. A smaller pork loin will only need about 10 minutes. If in doubt about the timing, look through the oven window every five minutes or so, and take it out when it looks crisp enough for you. After searing, immediately slice it and serve it. There's no need for a secondary rest period.
Read the original article on Mashed

