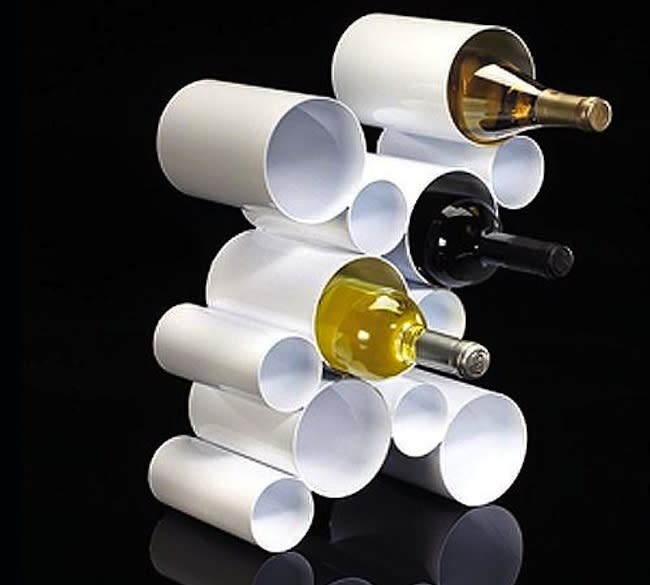
DIY PVC Pipe Wine Rack
When Rachelle, blogger from Adventures in Creating, saw a modern (and pricey!) wine rack for sale, it was love at first sight. And when she realized she could make her own strikingly similar DIY wine rack using PVC pipe, well, the rest was history. Using her handy power tools and a heavy dose of ingenuity, she elevated the simple PVC pipe to an accent piece worth showcasing in any modern home. Take a look below to see how she did it—and you'll see why this project gets a big thumbs up from BobVila.com.
MATERIALS
- 4" round PVC pipe
- 1.5" round PVC pipe
- Dremel (or mitre saw)
- safety glasses
- mask
- #8-32 x 3/4 screws
- epoxy glue for plastic
- spray paint
STEP 1
I bought lengths at the hardware store. It was a little over $1 a foot. You can have them cut it down to the length you need so you won't have to buy a big giant long pipe. I used 4" and 1.5" pipe.
STEP 2
I used the plastic cutting bit of my Dremel to cut the pipe down further to 6" lengths, 6 of each size. You can use a mitre saw or hack saw to cut the pipe if you don't have a Dremel. Be sure to wear eye glasses and a mask—pipe dust gets everywhere!
STEP 3
Once I had all my pieces cut I used a sander so smooth out the edges. If you use a different kind of saw you might be able to skip this step, my edges were not completely even. Then clean all your pipes to get any dust or residue off.
STEP 4
After that I arranged my pipes in the pattern I wanted, looking at the original picture as a guide.
STEP 5
My main issue next was how to attach the pipes. There's plenty of ideas of how to attach them end to end, but side to side was a different story. I decided to use a mixture of screws and epoxy glue made for plastic. (*Note: I have recently learned that Pluming Adhesive would be best for this!) I used #8- 32 x 3/4" machine screws. We don't have a real hardware store in our town so this is the best Walmart had. They are long enough to fit through the 4" tubes where they connected and not to long on the ends where the 4" and 2" tubes connect.I marked the edges that needed screws then drilled 2 holes on either end 1" in from the ends.
This was the hardest and most time consuming part. Marking each edge then drilling took some time but was successful in the end.
STEP 6
After is was all together I used Locktite Epoxy Glue made for plastic (again all Walmart had- E6000 or another brand would work fine) and poured it into the crevices. Because the screws are attaching hard edge to hard edge, the joints were a little wobbly. The glue helped keep them in place. Next time I might try rubber washers and see how that does instead.
I let the glue cure for 24 hours, then it was time to paint! I used a white Rustoleum spray paint to cover any of the original markings on the PVC pipe and to disguise the screws.
Thanks for sharing, Rachelle! To see even more of her inventive DIYs, check out her site, Adventures in Creating.
Related Articles


