
How to French a Rack of Lamb Like a Chef
Follow these expert tips and tricks for making your lamb look its best.
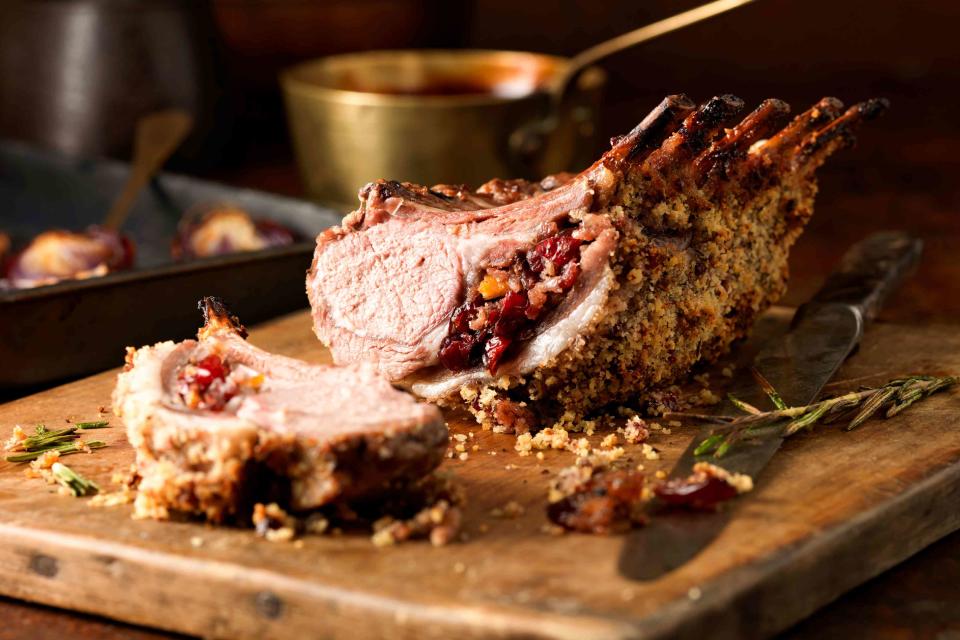
Diana Miller / Getty Images
Chances are good that if you’re cooking a rack of lamb it’s a special occasion. The pricey cut is a go-to for romantic dinners, holidays, and other celebrations. And we can see why. A rack of lamb is delicious — and it delivers some serious drama. The tender meat with the rows of glistening white bones is the quintessential centerpiece dish.
And there’s a name for the look of a classic rack of lamb: frenched, which means removing the meat, fat, and sinew from the bones to create that orderly presentation. While lamb isn’t the only meat that’s frenched (some cuts of pork and beef also get this fancy treatment), it’s the meat that’s most commonly prepared this way.
You can buy racks of lamb that are already frenched or ask your butcher to take care of that for you, but if you want to have complete control of your roast or want to tap into your inner butcher, you can tackle the job yourself. To help you get it right, we went to two experts: Erika Nakamura, co-founder of Butcher Girls, and Karen Akunowicz, chef and owner of Fox & the Knife and Bar Volpe in Boston and author of Crave: Both Recipes That Make You Want Seconds. Read on for more info about frenching and for their expert tips and tricks.
Related: How to Cook Lamb Like a Chef
Why do you french a rack of lamb?
One of the primary reasons is aesthetics — a frenched rack of lamb just looks fancier and more impressive when it comes to the table. There is also some practical rationale behind the classic French technique. “Its primary value was to expose the bone, so that the diner could easily pick up the piece of meat using the bone without soiling their fingers,” says Nakamura. “The French also believe that it also provides an element of even cooking by trimming away the thinner membrane, preventing such thinner parts of the meat from browning or burning.”
“Frenching doesn't affect the flavor of the rack of lamb, but it does make it more beautiful,” adds Akunowicz. “And if you are looking for that beautiful presentation on the plate or if you're going to slice them into chops, then you want to be able to pick up that chop by the bone, Frenching is definitely the way to go.”
That said, it is possible to cook a rack of lamb without frenching it first. “When cooking an un-frenched rack of lamb, you can often witness the shrinking of the meat in a natural receding of the meat from the ends of the bone,” says Nakamura. “The crispiness of the meat along the bone is often a treat, so trimming that away in the initial preparation eliminates the final reward of those pleasures.”
Related: 24 Tantalizing Lamb Recipes
What you need to french a rack of lamb
Before you start slicing, gather your equipment.
Boning knife or paring knife: To navigate around that row of skinny lamb bones, it’s helpful to have a nimble knife. The best tool for the job is a boning knife. “The shape of the blade and the length of the blade is perfect for not only peeling back the fat and scoring the sinew across the bone, but it's a beautiful shape for going in between the bone, cutting out the meat, and then scraping the last bits of fat and sinew off the bone, so that they are beautiful, curly, and perfectly clean,” says Akunowicz. If you don’t have a boning knife, a sharp paring knife will also work.
Related: The 7 Best Boning Knives, According to a Chef
Cutting board: Before you start, make sure you have a sturdy spot for cutting. Grab a large cutting board and make sure it’s secure on your counter. The last thing you want is your board slipping and sliding as you try to clean off all of those lamb bones. You can place a damp paper towel or kitchen towel under your board to make sure it stays put.
Related: The 6 Best Cutting Boards
Kitchen towels: Speaking of kitchen towels, it’s handy to have one for cleaning off the lamb bones after you’ve taken the pass with your knife.
Related: The 7 Best Dish Towels, According to a Chef
Butcher’s twine: Nakamura likes to use butcher’s twine to yank off the sinew and meat. If you have some handy you might want to try that method (more on that below).
How to french a rack of lamb, step-by-step
Before we get started, be advised that there is more than one way to french a rack of lamb. Nakamura and Akunowicz do it slightly differently from each other, and other chefs or butchers have other preferred ways of prepping a rack of lamb. Read through this process and decide what works best for you.
Matt Taylor-Gross / Food Styling by Barret Washburne
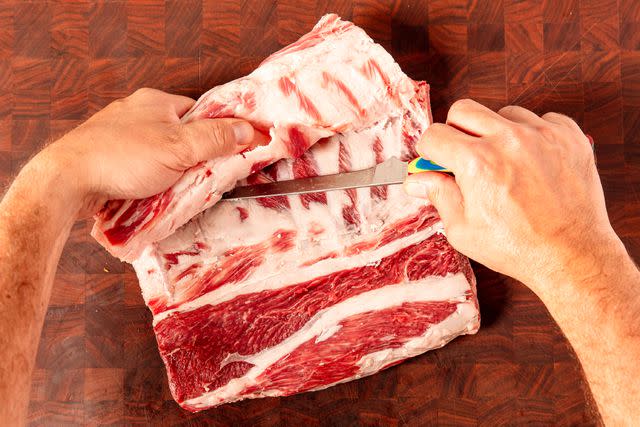
First, decide how much fat to remove
There will usually be a significant fat cap on an untrimmed rack of lamb. The first decision you need to make is about how much of that fat to take off. Nakamura leaves it as-is (when I asked her, her response was an all-caps DO NOT REMOVE THE FAT) while Akunowicz sometimes removes it and other times leaves it on. Some people like the extra flavor it adds, while others feel like the lamb fat adds to much of a gamey flavor to the meat.
To remove most of the fat, Akunowicz suggests holding the lamb so the eye (the meaty medallion) is facing you and the meat is arranged lengthwise on the cutting board, away from you. Run your find down the outside of the fat cap and gently loosen it from the meat and peel it up toward the bones. Gently slide your knife down the length of the bone to remove the fat.
Matt Taylor-Gross / Food Styling by Barret Washburne
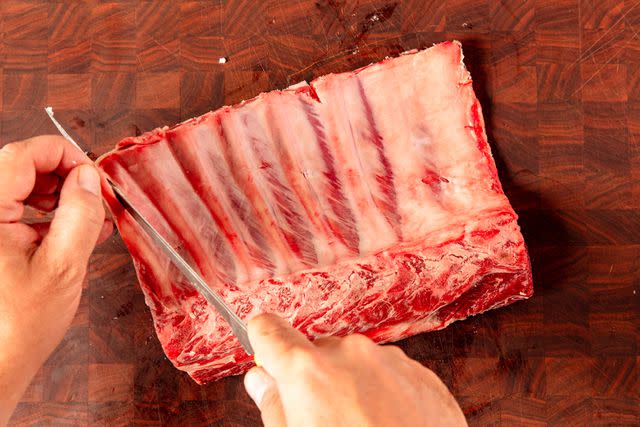
Start slicing
To decide how much meat and membrane to remove from the rack, Nakamura uses her fingers as guides. “Measure 1 to 3 finger widths from the eye of the chop towards the end of the bone,” she says. One finger width will expose more of the bone; three will expose less. Once you decide, slice all the way across the bones on the outside (fat side) of the rack, using enough pressure until you feel your knife hit the bone. Repeat on the other side.
Next, Nakamura likes to poke the knife between each rib, creating short horizontal cuts between the bones. “Make contact with your blade and bone, effectively scoring the membrane of the interior of the bone,” she says.
Matt Taylor-Gross / Food Styling by Barret Washburne
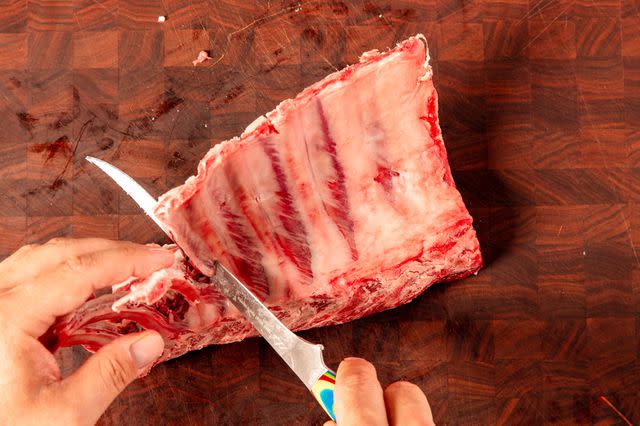
Score the bones
Flip the rack over so the fat side is facing down. Using the tip of your knife, score the membrane that’s on top of each bone. Score along the bone vertically, starting from the horizontal incision and continuing to the end of each bone. “Stay in the middle of each bone and go slowly,” says Nakamura. Repeat this on all of the bones.
Matt Taylor-Gross / Food Styling by Barret Washburne
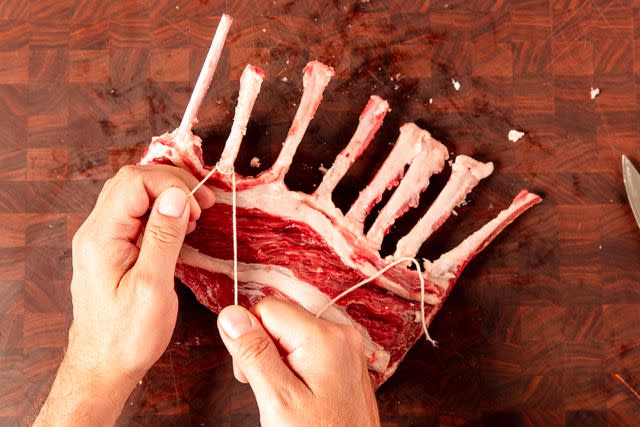
Remove the meat and membrane
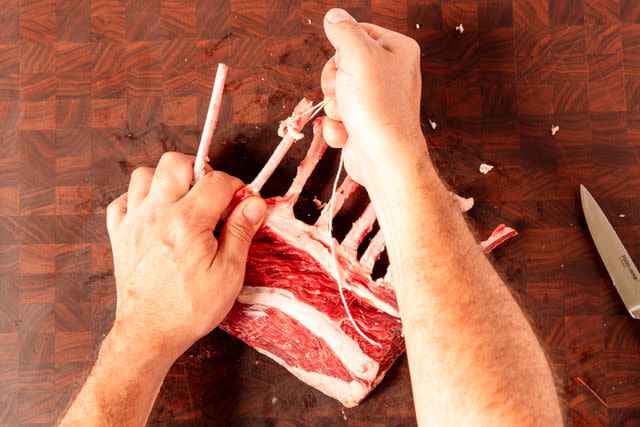
Again, there are a few ways to do this. One option Nakamura suggests is tying a 12-inch length of butcher twine where the bone is exposed around each rib. Wrap the loose end around your knuckles, hold the rack with your other hand and give it a big yank. The meat and membrane should mostly come off. Repeat as needed until the bones are pretty clean.
Matt Taylor-Gross / Food Styling by Barret Washburne
You can also use your fingers to separate the meat and membrane from the bones, gently pulling and twisting the rack until the bones are free. You should be able to pull most of the meat and membrane off, but you might need to use your knife to release the last bits of meat.
Matt Taylor-Gross / Food Styling by Barret Washburne
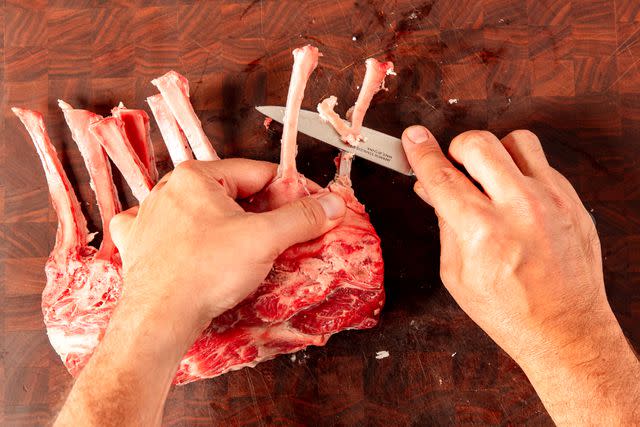
Clean up the bones
To give the rack a clean look, you can use your knife to scrape off any remaining meat and sinew.
Matt Taylor-Gross / Food Styling by Barret Washburne
Don’t toss the trimmings
What you removed from the bones is packed with delicious flavor. You can use it to make a delicious sauce or a rich lamb stock.
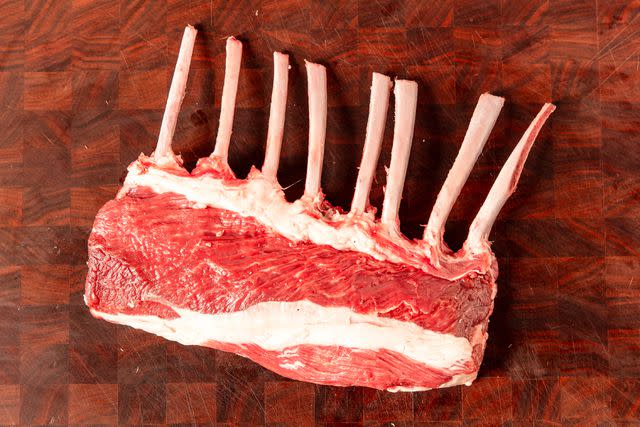
Just like with anything, the more you practice the easier it will be and you’ll also learn what methods work best for you. If you have a pretty decent looking rack of lamb at the end of the process, pat yourself on the back!
For more Food & Wine news, make sure to sign up for our newsletter!
Read the original article on Food & Wine.

