My Mom’s No-Bake Cookie Recipe Is So Easy, She Made It Once a Week
These ooey-gooey treats are customizable with as many ingredients as you want.

Getty Images
Nothing takes me back to my childhood like a Rice Krispies treat. I grew up helping my parents stock the aisles of their gas station and convenience store in the suburbs of Denver, where they sold everything from lottery tickets and cigarettes to hundreds of pantry items. While Mama and Papa retired in 2018 after operating the business for 35 years, I have vivid memories of the mini mart’s many shelves, one of which was neatly stocked with more than two dozen types of cereal.
When I was in elementary school, Mama would pull boxes of Cocoa Puffs, Golden Grahams, Cheerios—whatever had the nearest expiration dates—off the shelves to make no-bake cookies. They were her version of the classic Rice Krispies treats, ooey-gooey goodies made with marshmallows, butter, and cereal that might otherwise go to waste. I loved watching the marshmallows melt into a glossy blob, mixing in different combinations of cereal, and folding the finished squares in plastic wrap.

We’d snack on them at home and regularly gift them to my classmates and the gas station’s customers. Mama and I were so enchanted with the recipe that we once made a mini house out of marshmallow treats for Christmas and squished them into different shapes and bedazzled them with sprinkles and candy to give out for various holidays (think: pumpkins for Halloween and bunnies for Easter). These days, I make my own version of her kitchen sink recipe, adding ingredients such as pretzels, nuts, and whatever I’m craving to the cereal-marshmallow mixture. Here’s how to whip them up yourself—with as many ingredients as you want.
How to Make Mama’s Kitchen Sink Rice Krispies Treats
Recipe Tip
The key to customizing this no-bake cookie recipe—which is a variation of the original recipe printed on the back of the Rice Krispies box—is to substitute one to two cups of cereal with whatever you want. I recommend roasted nuts, crumbled cookies (yes, really), and pretzels, but the sky’s the limit.
Ingredients
1 stick of salted butter
1 10-ounce bag of marshmallows (mini or large)
6 cups cereal (such as Rice Krispies or any combination of whatever cereals are in your pantry) and/or mix-ins
Directions
Butter a 9x9-inch pan, spritz it generously with cooking spray, or line it with parchment paper.
In a large saucepan, melt the stick of butter over low heat. Once it’s melted, remove the pan from the heat and stir in the marshmallows, coating them with butter. Put the pan back on the heat and stir the mixture on low heat until the marshmallows are completely melted but not bubbling (about 4 to 5 minutes). Once the marshmallows get foamy and bubbly, that means that they’re carmelizing, which will yield chewy, potentially hard treats. So take the pan off the heat before they reach this boiling stage!
Fold in the cereal and/or your choice of other mix-ins.
Press the mixture evenly into the pan.
Let the treats cool for at least 20 to 30 minutes before you cut them into squares.
Tips and Variations

Measure out your ingredients: Make sure the combination you come up with is the equivalent of six cups—or you might need to add more marshmallows to bind everything together.
Have everything ready: To ensure you don’t overcook the marshmallows, which is easy to do if you’re scrambling around the kitchen, measure out everything you need in advance.
Add salt: Stir in 1 teaspoon of salt with the cereal to balance out the sweetness of the marshmallows. Or I’ve also seen recipes that incorporate 1 teaspoon of vanilla extract.
Brown the butter: To give your marshmallow treats a more complex, nuttier flavor, use brown butter, which takes just a few extra minutes to make. You’ll also need to substitute the salted butter in the recipe for unsalted, which is better for browning.
Don’t compact: Gently press the marshmallow-cereal mixture into your pan to ensure your treats stay light and airy.
Jazz them up at the end: While the Rice Krispies treats are cooling, top them with sprinkles or chocolate chips (you can also stir the latter into the marshmallow-cereal mixture, but they’ll get melty).
Go dump-cake style: Try the one-pan method, which involves putting all of the ingredients into a baking dish and popping it in the oven.
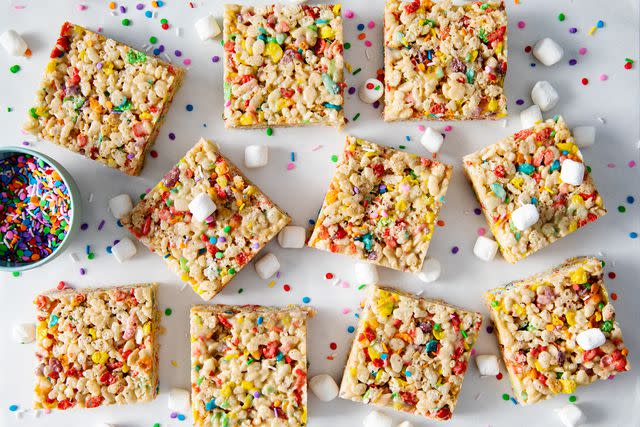
Get creative: Drizzle melted chocolate over Golden Grahams and marshmallows to produce s’mores-inspired treats, or mix Rice Krispies with Lucky Charms or Fruity Pebbles for rainbow-colored goodies. You can form shapes with cookie cutters or press the mixture into molds.
Related: 15 Fun Twists on Classic Rice Krispies Treats
Read the original article on ALLRECIPES

